The National Examination Council (NECO) is one of the top Secondary School Certificate Examination (SSCE) boards in Nigeria, offering examinations for various levels of primary and secondary education in Nigeria. Their SSCE examination, which is basically for senior secondary school students, is comparable to the West African Examination Council (WAEC) exams in terms of relevance and acceptability.
NECO conducts its SSCE examinations twice a year, with the June/July examinations typically serving as the main SSCE examination for students completing their final year of secondary school. The November/December examinations are often taken by private candidates and serve as an opportunity for individuals who were unable to sit for the June/July exams or who wish to improve their grades.
Nevertheless, the purpose of this article is to show you how to check your NECO results online without stress. Checking the NECO results online is a simple yet tricky process. But fret not! With this simple step-by-step guide, you will be able to check your result, whether the June/July examinations or the November/December intake.
Table of Contents
How to Check NECO Results Online
Follow these steps to check your results for either the June/July or the November/December examinations:
Step 1: Purchase Token
Checking the NECO results online requires a token, which is a string of numbers solely for the purpose of checking the results. The token can be purchased from the NECO website or other accredited outlets. Here’s a simplified guide to purchasing the token from the examination board’s website:
Create an Account or Login into Existing Account
To purchase the token from the board’s website, visit https://neco.gov.ng/results and tap the “Purchase Token” button. This will redirect you to the result-checking page at https://results.neco.gov.ng/login
You will be required to create an account if you don’t already have one, or you can simply log in if you already do. The account creation is a simple process that takes only a few seconds and you’ll be required to enter your first name, middle name, and last name, email address, and password. Login into the newly created account and you’re set to purchase the token.
Purchase Token
Locate the “Purchase Token” button on the dashboard after you’ve logged in to the account. You will be requested to indicate the number of tokens you want to purchase before proceeding. The minimum token you can purchase per transaction is 1 and you can purchase as high as 100 tokens.
The token is sold for just 1,100 which includes the service charge and the stamp duty. Verify the correctness of the information and click on “Make Payment” to finalize the payment via remita.
Copy the Token
You will be redirected to your dashboard on the result checker website after completing the payment. If you’re not redirected, return to the page by visiting https://results.neco.gov.ng/. The token purchased can be viewed by clicking the “View purchased token” button on the dashboard. Copy the token and you’re set to check your result.
Step 2: Check Your NECO Results Online
Select the “Check Result” menu from the dashboard if you’re logged in. If you already have a token and want to check the result directly, visit the result checker page at https://results.neco.gov.ng/
Input the Token
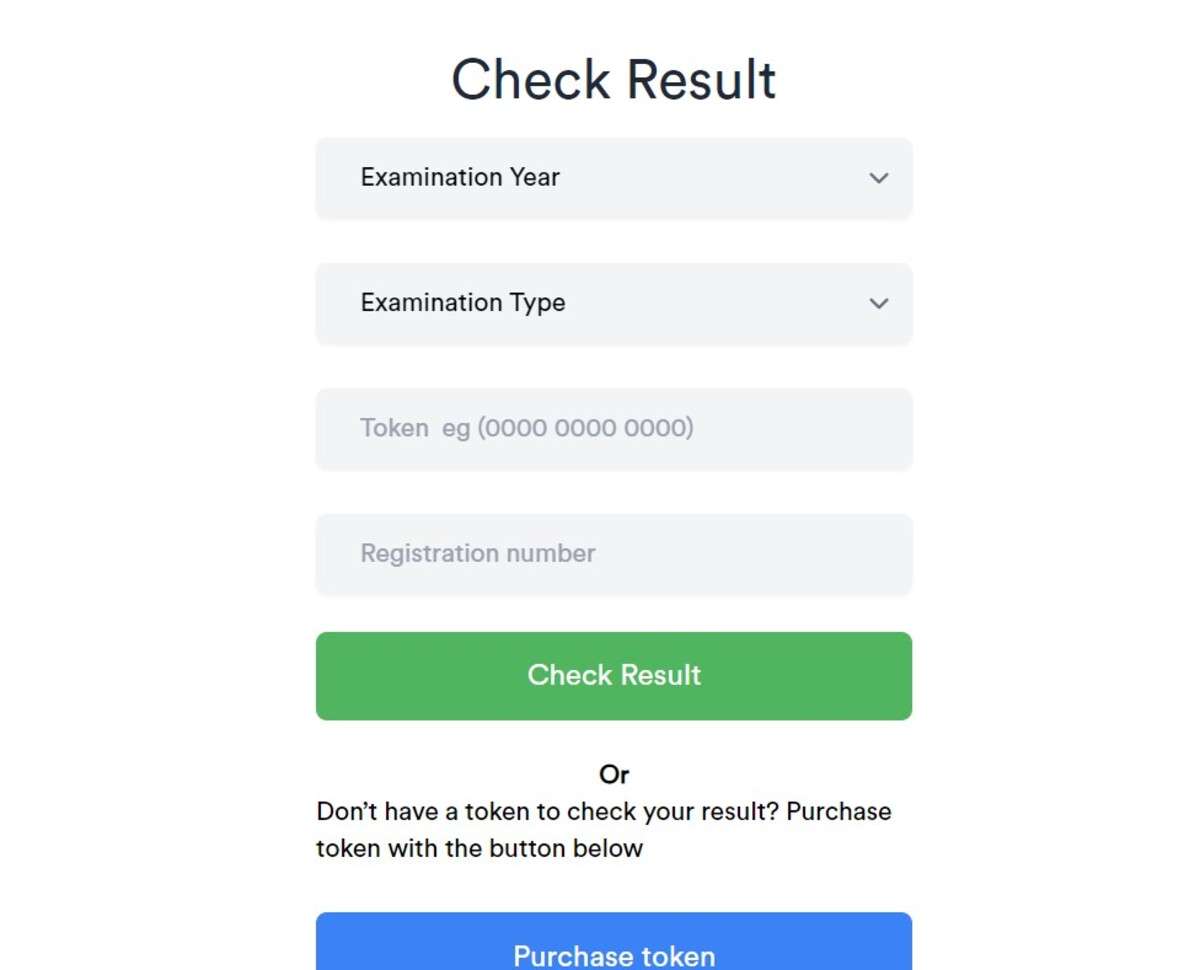
Input the token and your examination number in the fields provided. Select the examination year and the examination type. The SSCE Internal is the June/July examination for students in the final year of their secondary school education while the SSCE External is the November/December examination.
Ensure the examination date is not mixed up to prevent checking the results of another person. NECO uses basically the same examination number for each of their centres, which remains the same over the years. This implies that the set of examination numbers for candidates in Dream High School in the year 2000 is the same for the candidates writing the exams in the year 2024 in that same school.
Thus, if your examination year is 2009 and you select 2008 while checking the result, you will be checking the result of the person who has your examination number in 2008.
Submit the Information and Print Results
Confirm the correctness of the information you have inputted and click on the “Check Result” button. Take a deep breath while you wait for the page to display your full grades. You can print out this information and tender it for admission purposes or other purposes that require your O’level result.
Final Advice
Other than purchasing the result token, this result-checking process is simplified and direct. However, ensure you have a stable internet connection before checking the result or most importantly, when paying for the token on remita. Lastly, double-check the information provided to avoid checking the wrong results and wasting the tokens.
FAQs
- Where can I purchase the token?
The safest place to purchase the token is from the result checking page, as explained above. Meanwhile, there are other accredited outlets and websites that sell tokens. Overall, it’s best to consider your convenience and make things simpler for yourself.
- How many results can I check with a token?
Each token can only be used to check one result for a specific number of views. If you want to check for more people, consider purchasing more tokens.
- How many times can I check a result with a token?
A token can be used to view one result for up to 5 times. If you have to view the result after exhausting the token’s five times usage, you need to buy a new token!
- Can I share my token with another person?
You can share an unused token with another person in case you purchased more than you needed. However, once they use it, it becomes associated with the result it was used to check and it can only be used five times.
